Recently, after about 2 years away, I’ve started to get back into Virtualisation. As part of that, like any true geek, I wanted to build a Home Lab.
I had some criteria for the homelab computer:
- Must be quiet
- Should be power-efficient/low power. Energy in the UK is expensive!
- CPU must support Intel VT-x with EPT, and VT-d virtualisation technologies
- Under £600 (roughly $1,000)
- System must be powerful enough to run nested hypervisors (enough RAM, CPU and Storage capacities)
- Minimal self-build. I don’t have the inclination to build a white-box solution. If you do, check out Chris Wahl’s awesome resources.
And some nice-to-haves:
- Compact physical footprint
- Preferably run VMware ESXi without any installer ISO hacks or driver mods
- It should have enough Storage capacity to host AutoLab and some Hyper-V instances, too.
Why nested virtualisation?
Simplicity, cost, and a lack of a home office.
If you don’t know already, Nested Virtualisation is the practice of running a bare-metal hypervisor inside another bare-metal hypervisor. For example, you can run ESXi on a physical host, and then run multiple copies of ESXi as Virtual Machines.
Running nested VMs opens up the possibility of creating an entire virtual lab inside a single computer, including things like a VM NAS appliance and a VM router. This is very, very cool and eliminates the need for a physical switch/networking infrastructure for the lab. And you can also run Hyper-V inside ESXi, if you want to. William Lam has some great resources on running Nested Virtualisation
I don’t earn enough money to justify spending 2,000 pounds, euros or dollars on a home lab to kit it out with a NAS, VLAN-capable managed switch, and multiple hosts with multiple NICs. If I can run nested hypervisors in a single box, I should save myself a lot of money short-term and I always have the flexibility to expand the lab later. Because I knew I’d be saving money by not buying so much equipment, I was prepared to spend a little more on a single server.
I also don’t have a spare room or office to hide this homelab in. It must sit on or under my desk in the living room, next to my head, the TV and the open-plan kitchen.
Choosing a suitable candidate
Finding a CPU
When you’re making a virtualisation home lab, it’s important to consider the Virtualisation features on the CPU you’re buying. For server-class hardware, this doesn’t matter as much as many Xeons support Virtualisation, but for consumer-grade CPUs it’s important to check.
I found the Intel ARK website fantastic for this, as it allows you to create comparison tables for CPUs. I made one that compares the CPUs in the i3 and i5 versions of the Gigabyte Brix, Intel NUC, and the Xeon in the Dell T110 II, which really helped guide my decisions: Compare Home Lab system CPUs
Useful CPU features in a Virtualisation Home Lab:
Intel VT-x with EPT (Extended Page Tables)
These two features, combined, enable you to run Nested Hypervisors with 64-bit Guest OS support.
VT-d
This enables you to directly “map” a physical device connected to the PCI bus, such as a USB controller or an external NIC, for exclusive use by a Virtual Machine. This is useful, but not essential for everyone.
Finding a Suitable Computer
In the sections below, I’ll cover a general overview of the system and specs relevant to home labs, such as: Physical Size, CPUs, max RAM, Storage options, NICs, Expandability, Power Consumption, Noise, and Cost.
Server-Class: Dell T110 II
I looked at Chris Wahl’s excellent home lab notes and took a look at the Dell T110 II, the successor to the T110. It’s a nice system: Quiet and relatively power efficient, especially considering that it runs a Xeon. It’s also on the VMware Hardware Compatibility List. The only negative for this system is that it’s quite large for my requirements. I found some good deals in the Dell Outlet, but I never bit the bullet as the processor was always the older E3-1220.
Here’s the system spec that nearly won me over:
- Size: Tower server.
- CPU: Intel Xeon E3-1220V2. It’s fairly old, but is on VMware’s HCL, and supports VT-d and VT-x with EPT
- Max RAM: 32GB (ECC)
- NICs: 1, but can add more through expansion slots.
- Storage: Up to 4 SATA drives, with RAID options if you’re willing to pay a premium
- Expansion: Plenty of space and PCIe slots for expansion
- Power Consumption: 38W at idle, 110W max
- Noise: Reviews seem to confirm the T110 II is quiet
- Cost: Roughly £550 including VAT for a system with 3-year warranty, 8GB RAM, 1 x 500GB HDD and Intel Xeon E3-1220V.
Why I didn’t go for it:
- Ultimately, it’s just a bit too big for my situation (but still requires less floorspace than many rackmount servers)
- It’s an 11G server (currently on 12G) and I’m convinced that Dell may replace it with something better soon
- While still very good, the power consumption just wasn’t as good as the compact PCs below (but it is a server-class system, so that’s to be expected)
Nano-Class: Intel NUC and Gigabyte Brix

From my research, there’s two main Nano-sized contenders in the Home Lab space: The Intel NUC and the Gigabyte Brix, available in Core i3, i5 and i7 flavours. The i7 was overkill for me – and prohibitively expensive – so I left it out of contention.
The Brix and NUC come in barebone kits to which you add your own RAM and mSATA SSD. This makes the total cost flexible to individual needs. Both brands offer roughly the same features for a home lab, and choosing one usually depends on personal preference.
Here’s the generic specs for the systems:
- Size: Very small (about the size of an Xbox 360 controller)
- CPUs: Core i3 and Core i5, both supporting VT-x with EPT. The i5 systems support VT-d, if you require that
- Storage: The systems take an mSATA HDD. If you have an existing NAS for your VMware datastore, you can get away with a small mSATA drive of 32GB or using a USB stick to boot ESXi. Due to me wanting to run Autolab and not having a NAS, I bought a Plextor M5M 256GB as reviews say it’s pretty quick and it was around the same price-per-gig as a Crucial mSATA drive.
- Expansion: Due to its size, expansion is limited. You won’t be able to add extra NICs or SATA drives into these diminutive systems
- Max RAM: up to 16GB (2 x 8GB SO-DIMM). The CPUs will take 32GB, but there just aren’t 16GB SO-DIMMs available yet. I wouldn’t hold out for them either.
- NICs: 1 Gigabit NIC
- Power Consumption: The i5 version of the NUC apparently uses 10W at idle, and nearly 20W at load. My i5 Brix uses (measured at power outlet) roughly 12W at idle running ESXi and up to 25W when I push it really hard.
- Noise: Both systems are very quiet. The NUC is quiet. My Brix is incredibly quiet, and sits happily next to me on my desk. Fan speed ramps up under load, but it’s never loud.
- Cost: Generally the i3 versions of each system are around £250 ($400), and the i5 versions are around £320 ($515). Remember that you’ll need to add RAM and an mSATA SSD.
Let’s take a look at the individual merits of each system.
Intel NUC
The Intel NUC is a small, low power barebones system. It comes with different CPU offerings, including an i3 and i5 that support VT-x with EPT. The i5 supports VT-d.
For the NUC, in addition to an mSATA SSD and RAM, you will need to add a “Clover” or “Mickey Mouse” power cable for your country (Yes, really. One doesn’t come in the box).
Here’s the two main systems I feel are suitable for a home lab:
- NUC Core i3, supporting VT-x with EPT:
- Intel Site: Intel® NUC Kit DC3217IYE
- Reviews: Google search for reviews
-
Buy: Amazon UK Google Shopping
- NUC Core i5, supporting VT-x with EPT and VT-d:
- Intel Site: Intel® NUC Kit DC53427HYE
- Reviews: Google search for reviews
-
Buy: Amazon UK Google Shopping
Gigabyte Brix
I suspected a new NUC might be coming out with a Haswell processor, so I searched The Register. When I did, I saw an article on the Gigabyte Brix, and did some research on it.
The Gigabye Brix has the following advantages over the NUC:
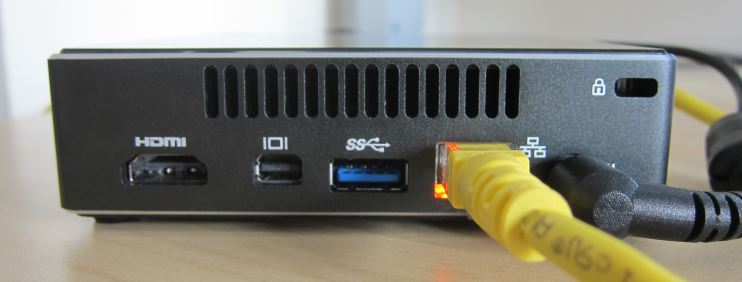
- The Realtek RTL8111E Gigabit NIC is natively supported in VMware ESXi 5.1, so no need to mess around with additional drivers. Although thanks to Alex Galbraith this is pretty easy for the NUC.
- Comes with a region-specific power cable (unlike the NUC, where you need to buy a laptop/clover/”mickey mouse” power cable to plug into the power adapter)
- Comes with a Wi-Fi adapter (not that useful for homelabs, though)
- 2 x USB3 ports (vs just the 1 on the NUC). The NUC however, does have 3 USB ports in total vs just 2 on the Brix. As I’ll be running my home lab system headless, and booting ESXi from a USB flash drive, this doesn’t matter too much, but it may be a consideration for you.
- At the time, the Brix was cheaper than the equivalent NUC. Prices have normalised now, though.
The Brix comes in two flavours that may be useful for Virtualisation:
-
GB-XM12-3227: Brix Core i3, supporting VT-x with EPT:
- Gigabyte Site: GB-XM12-3227 (rev. 1.0)
- Reviews: Google search for reviews
- Buy: Amazon UK | Google Shopping
-
GB-XM11-3337: Brix Core i5, supporting VT-x with EPT and VT-d:
- Gigabyte Site: GB-XM11-3337 (rev. 1.0)
- Reviews: Google search for reviews
- Buy: Amazon UK | Google Shopping
Choosing a Hard Drive and RAM for your Intel NUC or Gigabyte Brix
Hard Drive (mSATA)
The NUC and Brix take mSATA drives, which are smaller versions of standard SSD drives, generally available in Ultrabooks. SSD capacities go up to 256GB, and tend to be a little more expensive than normal 2.5″ SATA SSDs. From the research I did, these two brands were mentioned in good light:
- Crucial mSATA SSD M500 and the M4 are apparently reliable, and good value for money, and will cost you around £160 ($260, €190) for a 240+ GB SSD. Smaller capacities are cheaper, naturally. 128GB is around £80.
- Plextor M5M mSATA. A 256GB one will cost you around the same price as a Crucial SSD, I went for the Plextor, as the power issues mentioned in the Anandtech review have now been resolved with the 1.03 version of the firmware. More specs here
RAM
The NUC and Brix take standard laptop DDR3 1600Mhz non-ECC SO-DIMM RAM, making it cheaper to buy than ECC server RAM.
Rough costs for RAM are around £50 ($80, €60) per 8GB stick, so you’re looking at £100 for 16GB RAM. I went for Crucial RAM, as I’ve used them many times over the years and they’ve always been reliable
Conclusion
After careful consideration, I opted for the Gigabyte Brix Core i5 GB-XM11-3337 system as it met all my requirements and, at the time, it was 20% cheaper than the NUC. I added 16GB of RAM, and a 256GB SSD.
Total cost was around £575, so only slightly more expensive than a Dell T110 II server.
So far, it’s running nicely with VMware ESXi 5.1, and I’ve tested and confirmed that it supports nested virtualisation by following William Lam’s Nested guidelines and am now running Hyper-V Server 2012 R2 nested. I’m in the process of trying to setup AutoLab on it to run a full nested environment.
I’m looking forward to putting ESXi 5.5 on it to take advantage of the C-states support for even lower power usage when idle. It currently uses around 10 Watts at idle.
If you found this useful, or have any feedback on this article, let me know 🙂
Share and enjoy 😉